Abstract
This blog post describes various attempts at improving the networking of my slightly complicated home network (“homelab”) only to finally come back to a partial, but easy solution.
While one could consider the whole story a failure, there were some useful insights along the way that could prevent future readers (most notably myself) from making the same mistakes again in the future.
A Slightly Complicated Home Network
Since a long time ago, my home network was running off a Cisco SG110-16HP to which I had upgraded coming from a Netgear GS108.
- Netgear GS108
- 8-port unmanaged fanless Gigabit Ethernet switch with external PSU and Desktop form factor. Works reliably but is too small for growing deployments and also not rack-mountable…
- Cisco SG110-16HP
- 16-port unmanaged fanless rack-mountable Gigabit Ethernet switch with internal PSU and 8 PoE ports IEEE 803.11af (max. 15W per port, 60W total PoE budget). It has been working reliably for years but has too few ports for growing deployments.
After years of not having any PoE capable device, I used attached an ARM SBC (Banana PI M2+EDU) via a POE splitter. Later, I added a VoIP phone (Grandstream GXP 1625) with native PoE support.
With a continuous (but slow) addition of new devices, the number of ports was exceeded and the old Netgear switch was again attached to the network to serve less important devices one additional hop away from the central Cisco switch.
Occasionally I forgot to turn on the Netgear switch when starting one of the attached (mostly headless) PCs and only noticed the error when I couldn’t reach the PC using SSH. Since these were mostly old machines, the necessary reboot to get SSH connectivity up was quite time consuming. This in itself didn’t warrant for an upgrade of the network technology. Also, I didn’t want to run the small Netgear switch (with external PSU) 24/7 due to the old sysadmin rationale that switches with external PSU are not well suited for 24/7 operations. On most such switches, the external PSU seems to break earlier rather than later although I only ever experienced this phenomenon first-hand once and not with a Netgear switch.
I extended some PCs with 10G network cards: Currently, two PCs connect to one central one which has a network card with 2x10G ports with no switch in between at all.
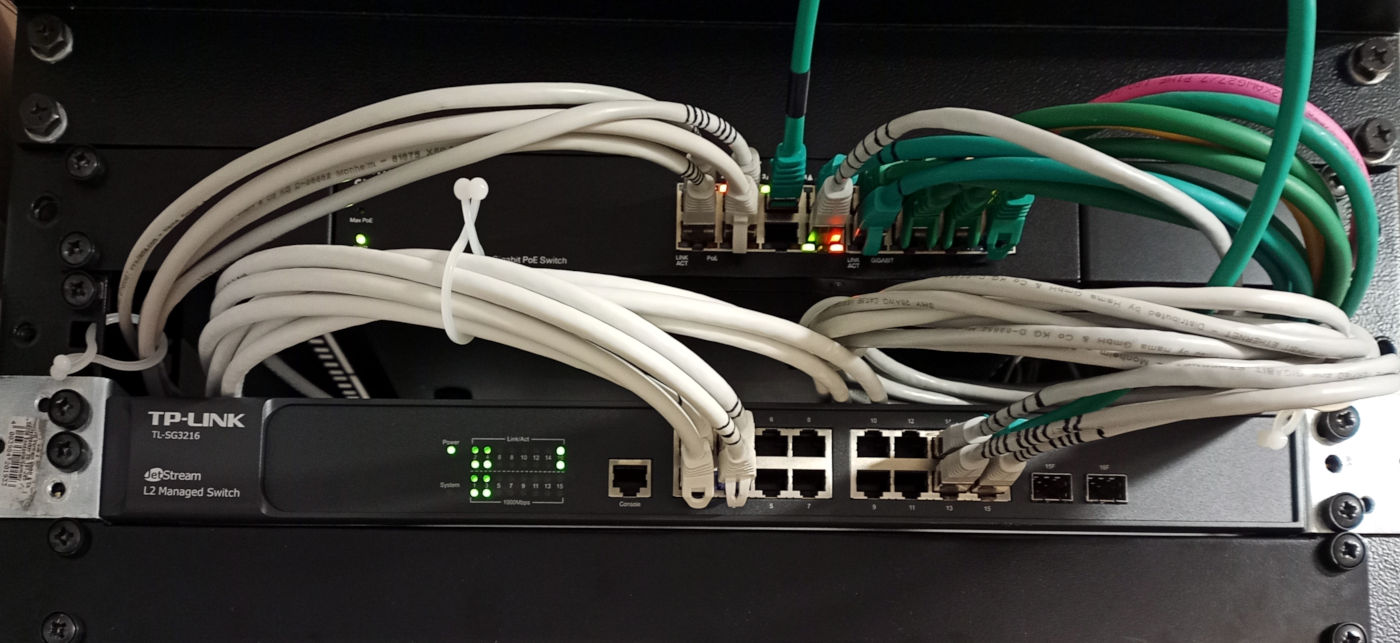
Then, I voluntarily complicated my home network a lot more by creating a small AES67 Audio network cf. aes67_audio_notes(37). This audio network eventually consisted of four devices in total: One PC and two speakers and an audio interface. Since AES67 requires a dedicated network and typically a managed switch with specific QoS settings, I “temporarily” set it up using a TP Link TL-SG3216 which I had received for free when it was decommissioned by the company I was working for at the time.
- TP Link TL-SG3216
- 16-port managed fanless 19” Gigabit Ethernet switch with internal PSU and console port in addition to a web interface. A reliable switch but without PoE capabilities.
In AES67 audio networks, components like audio interfaces and other small devices can often be powered by PoE (IEEE 803.11at). Unfortunately, the TP-Link doesn’t support PoE at all.
The setup was temporary for multiple reasons:
- There were now three switches on the Network and a hackish way to get the 10G connectivity between important nodes. I wanted to get back to fewer devices and a more reasonable setup here.
- Although the audio interface supports PoE, it was powered by an external PSU for the lack of PoE on the switch.
- I got the TP Link without rack ears - at the time it was not an issue because I didn’t have a rack anyways, but after the expansion of the network, I couldn’t rack it up properly.
To summarize, I now had the following topology:
    ┌────────┐
    │ ISP    │     ┌──────────────────────────┐      ┌───────────────┐
    │ Router ├─────┤ Cisco SG110-16HP         ├──────┤ Netgear GS108 │
    └───┬────┘     └─┬─────────┬────────────┬─┘      └─────┬─────────┘
        │            │         │            │              │
    ┌───┴─────┐  ┌───┴┐ ┌──────┴───────┐  ┌─┴───────┐  ┌───┴────────┐
    │ Some    │  │ PC ├─┤ PC with      │  │ More    │  │ Even more  │
    │ devices │  └───┬┘ │ direct 10G   │  │ devices │  │ devices    │
    └─────────┘      │  │ connectivity │  └─────────┘  └────────────┘
                     │  └──────────────┘
                     │
                ┌────┴──────────────┐
                │ TP Link TL-SG3216 │
                └────┬──────────────┘
                     │
                ┌────┴──────────┐
                │ Speakers      │
                │ and Interface │
                └───────────────┘
Juniper EX2200 and the Fan Mod Rabbit Hole
The multi-switch network topology was practically crying for some simplification and when I found a used Juniper EX2200 for cheap (around 70 €), I finally took this as an opportunity to consolidate the network into fewer components.
The idea was to replace all of the three previously used small switches with a single large one and have the audio network as a VLAN assigned to selected ports of the switch effectively partitioning it into two switches, a small part with high priority for audio and a large part with low priority for the remainder of the network traffic.
- Juniper EX2200
- 48-port managed actively cooled 19” rack-mountable Gigabit Ethernet switch with internal PSU, console port and all ports PoE capable per IEEE 802.11at (max. 30W per port, 405W PoE budget). The datasheet says 38.1 dB(A) noise level. This is the highest quality network switch and probably also the most capable one I have ever had. Very solid hardware, but loud.
It was clear from the beginning that fans could be too loud on the Juniper switch, but for the price some opportunity for fan modding was on the table and people online had successfully performed it: https://www.consentfactory.com/modding-ex2200-poe-switch-with-quieter-fans/
After testing the Juniper EX2200 with the stock fan configuration, it was indeed very loud.
I intend to work next to the rack and also listen to music in the same room. The switch was so loud that the noise was constantly audible even while playing music. Also, even through the closed door, I could still hear the high-pitched noise next room causing me to worry for my neighbors next apartment to be also affected by it.
If I understand correctly, the EX2200 was initially designed to run more quietly, but there were thermal issues and the minimum idle fan speed was raised in a later firmware version (which I was running): https://supportportal.juniper.net/s/article/EX-Fan-noisy-after-upgrading-Junos-OS-12-3?language=en_US
I thus set out to follow the fan modding. The article linked above talks about Noctua fans.
The following table contains some information about various fans of interest:
| Brand | Model | l/mm | Umin [V] | Umax [V] | Imax [A] | RPMmax | Q [m³/min] | Pstatic [Pa] | SPL [db(A)] | Comment |
|---|---|---|---|---|---|---|---|---|---|---|
| DELTA ELECTRONICS | FFB0412VHN | 28 | 4.0 | 13.2 | 0.24 | 9500 | 0.447 | 126.9 | 45 | Juniper EX2200 stock PSU fan |
| SANYO DENKI | SanAce 40 109P0412B3013 | 28 | 7.0 | 13.8 | 0.28 | 10300 | 0.380 | 143 | 40 | Juniper EX2200 stock rear exhaust fans |
| Noctua | NF-A4x20 PWM | 20 | no info | 12.0 | 0.05 | 5000 | 0.157 | 22.16 | 14.9 | Replacement fan from other blog post |
| Nidec | UltraFlo V40S12BS4A5-5 | 28 | 7.0 | 13.8 | 0.73 | 18000 | 0.750 | 465 | 55 | Fujitsu RX1330 M1 server fan for comparison |
| Arctic | S4028-15K | 28 | 4.5 | 12.0 | 0.47 | 15000 | 0.540 | 259.9 | no info¹ | 1st attempt for fan replacement |
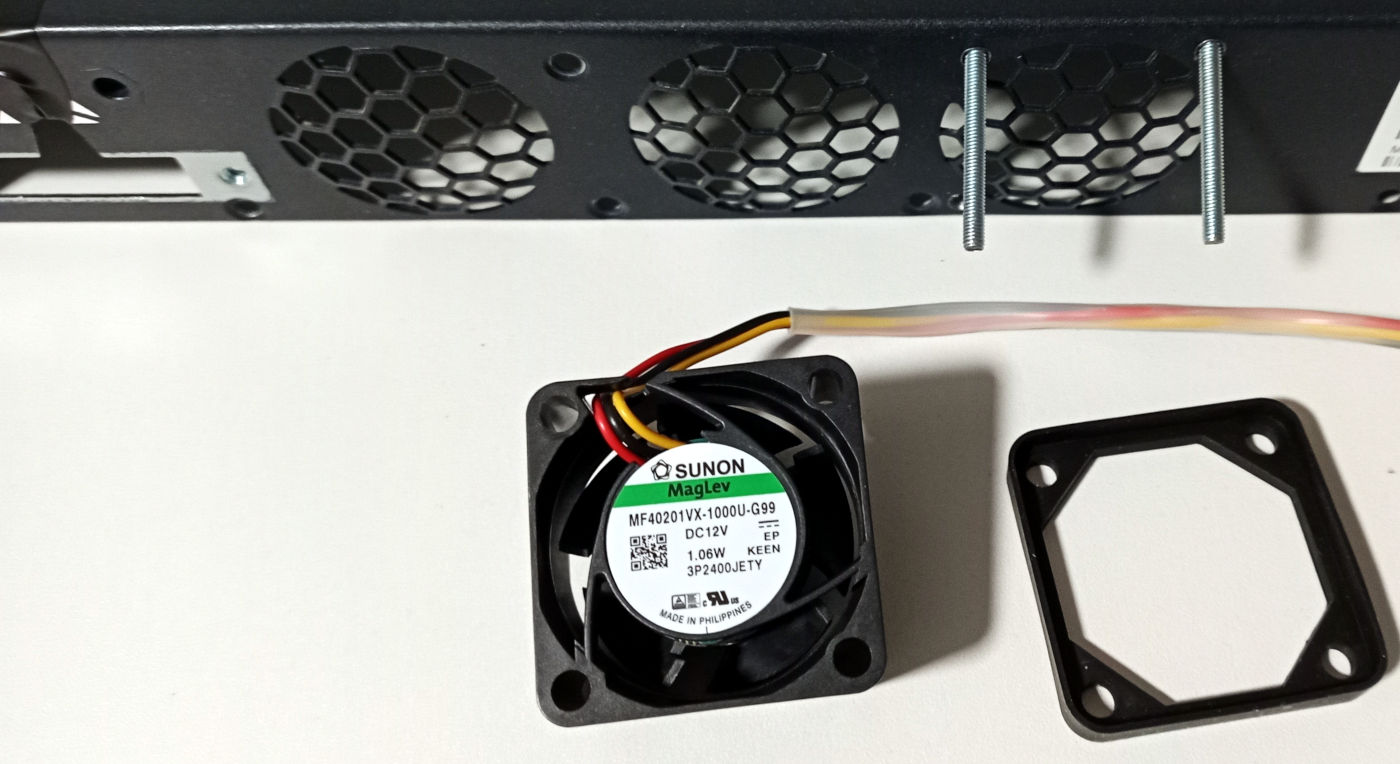
| Sunon | MF40201VX-1000U-G99 | 20 | 4.5 | 13.8 | 0.092 | 8000 | 0.302 | 72.2 | 27.5 | 2nd attempt for fan replacement |
¹) I asked Arctic’s customer support about this and after some delay after which I had already bought the fans they told me that they didn’t have any hard figures about this but that the fans sounded similar to a hairdryer.
First thing to note is that the suggested Noctua replacement fan is rated very lowly in terms of airflow and pressure. Even when adding two of them to the PSU it wouldn’t even get the same airflow and still be miles away from the original fan’s static pressure. Also, there is not enough space in the EX2200 chassis to fit more than the stock quantity of two rear exhaust fans hence the exhaust airflow would also be halved by the Noctua choice.
I thus tried to come up with my own replacement strategy. Knowing that the Nidec fans in my 1U server could run at quite low noise levels, I didn’t consider choosing a fan much below the original specifications and thus tried out replacing all of the stock fans using the Arctic S4028-15K. While the result sounded slightly less annoying, it was even louder than the original. Swapping two rear exhaust Arctic fans for the original SanAce saved a tiny bit of loudness but was still too loud.
I thus decided to enter the dangerous territory and cut down on the cooling performance by choosing a slower, but significantly less loud fan Sunon MF40201VX that would give me like 80% of the stock airflow for the rear exhaust and using a quantity of two fans (rather than the stock one) for the PSU about the same cooling capacity as originally designed.
I got the Sunon from Digikey with fan headers (useful for the exhaust fans) readily attached. Unfortunately, the wiring is incompatible to the “standard” one with the (+) and (-) pins exchanged on the Sunon fans. I cut the wires and exchanged (+) and (-) to get the fans running properly in the switch.
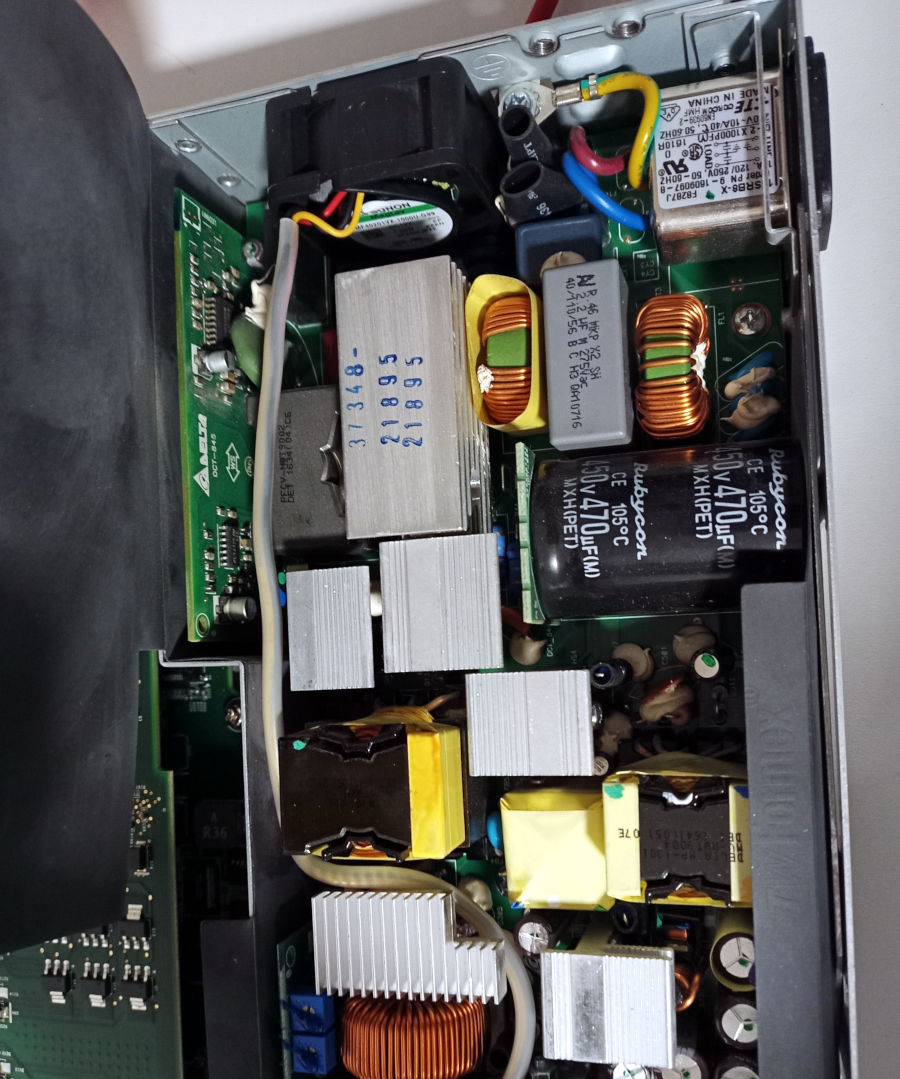
To supply the second PSU fan with power, I wired the second fan (outlet) in parallel to the primary one (inlet) leaving the tacho pin of the second fan not connected. Initially, there was some issue that the fans would alternate between not running at all, spinning for some time and then fail to come up again. Adding a 47 µF capacitor (not in the pictures!) in parallel to the outlet fan solved this issue and now all fans would spin.
Unfortunately, the result is still unreasonably loud for my use case with the noise still being high-pitched and clearly recognizable next room. I think with this change the switch could be OK to run next to me while working and listening to music as I am more tolerant to noise at the workplace compared to other people. However, I still wouldn’t want to subject the neighbors to the noise through the wall 24/7 hence no way to stay with this setup.
In the meantime, these are some open points to continue investigating on the EX2200:
- Is it possible to run an aftermarket OS on the switch? Can the OS do anything about the fan control? Initially I thought this might not be the case, seeing that the noisy DELTA fan was connected inside the PSU but it turns out it is actually supplied from the switch’s motherboard like the other ones? On the other hand, there does not seem to be any aftermarket OS available for the switch.
- Is it possible to downgrade the switch firmware to the old one that is known to result in thermal issues but at lower noise level and bypass the thermal issue by loading the switch only lightly – I guess I am never going to use more than 20% (~80W) of the PoE capacity and the current setup would be well below 10%? -> Unable to test, since I couldn’t get hold of firmware version 12.3R5.7 (SHA-1 = f98c35abbd267f058843f18aafb3738a53015d4e). To download it from Juniper, one needs to register there which I tried but couldn’t complete (account was created but disabled…) See also: https://www.reddit.com/r/HomeNetworking/comments/1iqyhok/juniper_ex2200_48p_firmware_version_123r57/
- Is there some constant voltage pin in the switch that I could use to
attach an MCU and then make use of that MCU to implement an own fan
control? I already have the Arctic fans with PWN feature. Ideas for an
own fan control could be
- Hook into the temperature readings of the switch (difficult, even when doing it with software over console/SSH?) and define an own control loop to change the PWM on an otherwise constantly supplied fan, feeding the tacho speed back into switch hardware to not get a fan failure alert in the switch. This would completely bypass the firmware’s fan control but due to the ability to shut off the PWM in event of communications issues with the switch temperature readings could be failsafe (although horribly loud) in event of control failure. The supply voltage would need to sustain a high current which makes it even harder to identify given that the original switch design doesn’t account for this.
- Hook into the voltage levels the switch supplies to the fans and use an ADC to process it in the MCU to indirectly deduce what the switch firmware wants to do with the fans (below max. voltage means it wants to throttle the fans) and in event of throttling use PWM to further reduce the fan speed. This is my preferred way to go if I attempt this at all. -> see below
None of this was immediately pursued because with the considered additional modding, the chance of breaking the switch seems to greatly increase and this could not be the strategy to rely on for general operations. At least some backup plan would be needed.
Update 2025-02-09: Regarding a Custom Fan Control…
After the immediate switching needs were addressed (see further down), I came back to check if I could somehow make the EX2200 work for me. The necessary firmware to downgrade to seemed to be hard to find and Juniper didn’t allow me to create an account to try it out.
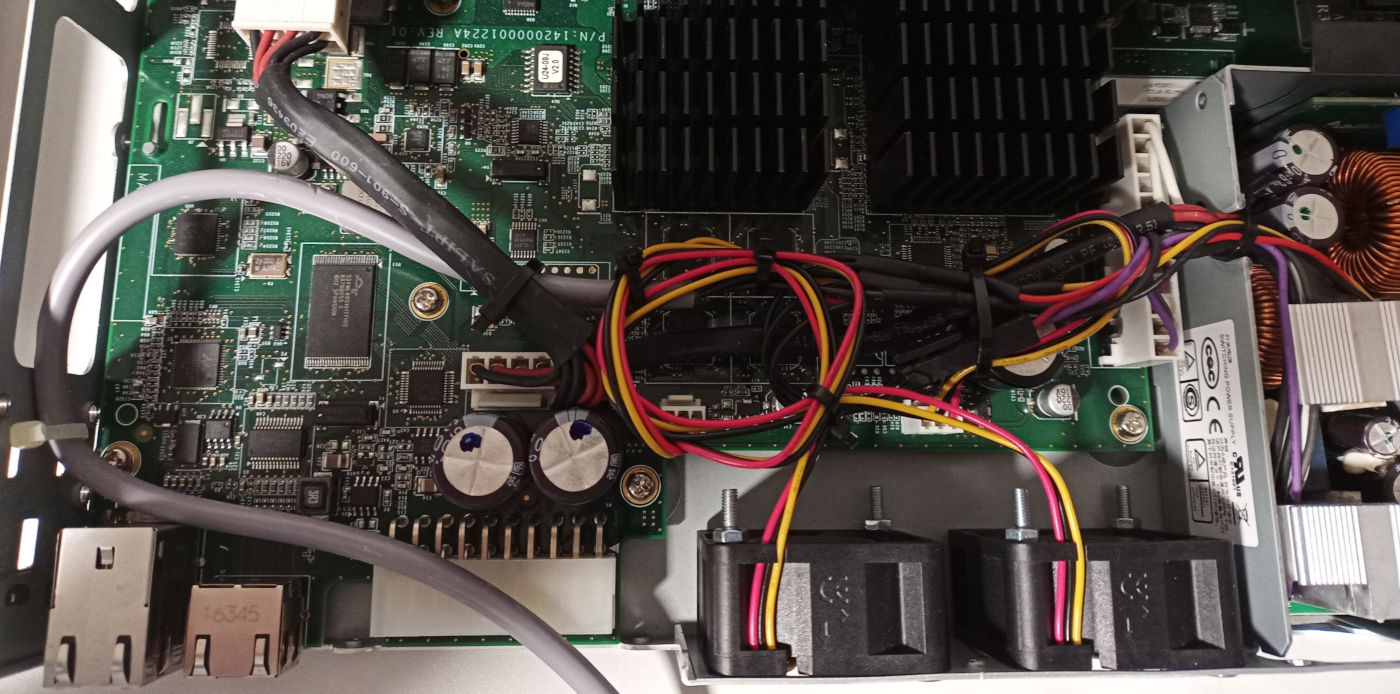
Hence I pursued the custom fan control variant (B) which would be much easier to implement than (A). It turns out that 12V supply voltage for a custom MCU addition can be trivially grabbed from the external power supply connector (leftmost upper pins are: +12V, +12V, GND, GND). Also, I found out that an Arduino Nano v3 can be hooked directly to the +12V and given that its GPIOs work with +5V I could use them to directly control the PWM of the Arctic Fans.
I again disassembled the switch PSU and replaced the Sunon fans with the Arctic ones, this time hooking into the + and PWM lines in order to attach the + to an Arduino ADC (via voltage divider) and PWM directly to the Arduino PWM.
I created a simple firmware that reads the voltage level via ADCs and goes to a table to lookup an associated PWM percentage to send and then configures the associated output at that PWM duty cycle.
This works fine for controlling the fans and the fans don’t seem to mind being controlled by varying voltage in conjunction with varying PWM at all except that it can sound a little weird as the voltage increases the fans speed up only to enter the next entry in the table which cuts down the PWM so they spin down again…
No pictures this time as the inner workings of this solution are a mess but at least the need for a cable that comes out to an externally mounted fan is eliminated.
Using a hand-crafted fan curve I was able to significantly cut down the noise this way. Unfortunately, the switch would still occasionally ramp up the fans very much (like every 10 minutes or such) and also despite trying to lower the fan speed very much (down to 30% PWM or such), even the “silent” operation was still too loud to be comfortable. I guess it might be tolerable to the neighbors this way, though.
I stopped at this point as it was clear I couldn’t get it to be “good enough” although it might now be in a state that the switch could be dropped into the network for a few days if one of the current ones were to suddenly stop working.
Some even better fan control might be achievable when creating a test bench where the tacho PIN of a reference fan could be used to gather a Voltage x PWM -> RPM mapping because this might allow creating an Arduino firmware that would control the fan speed in a way that could totally overwrite any decisions by the switch firmware by offsetting any unwanted voltage increases with a suitably decreased PWM. However, this would greatly complicate the control logic…
Notes on Pinouts
Just for my own reference. Trust your own measurements. Use with caution.
- Standard PWM fan header right to left: GND, +12V, Tacho, PWM. Standard colors: black = GND, red = +12V, yellow = Tacho, dark blue = PWM. Arctic fans have black 4-pin wires but the GND (pin 1) is marked with a white line.
- Switch fan header right to left (= standad 3-pin header): GND, +VDD, Tacho
- Sunon header (non-standard, mechanically but not electrically compatible): +VDD, GND, Tacho. Wires obey the standard colors, though.
- PSU fan connector (3-pin Molex Micro Fit!): red = +VDD, black = GND, light blue = Tacho
- External PSU connector upper row (left to right): +12V, +12V, GND, GND, …
HPE Aruba InstantOn 1830
After unsuccessfully trying to mod the EX2200, I set out to find a new replacement switch knowing that the more modern hardware could operate at lower noise levels. After extensive studying of the datasheets it seemed clear that there could be two ways and some compromise between silence and features would be needed:
- There are a few 24 port PoE switches available that don’t require active cooling but although 24 ports would seem to be a step up from the previously used 16 port switches, it would not have free ports for future network extensions. Also, it seems these models are very expensive and there is a huge premium to pay for a 10G uplink port which is a reasonable way to account for the limited number of ports by providing for a later addition of a satellite switch.
- There are numerous 48 port PoE switches available, but all of them require active cooling.
Here are two interesting models from the respective categories:
- Cisco CBS350-24P-4X
- 24-port 19” rack-mountable fanless managed Gigabit Ethernet switch with internal PSU, all 24 ports PoE capable per IEEE 802.11at (max. 30W per port, 195W PoE budget). The switch includes four 10G uplink SFP+ ports and is highly likely to be compatible with AES67 networks. It was too expensive a choice (670 €) for the time being.
- HPE Aruba InstantOn 1830 JL815A
- 48-port 19” rack-mountable actively cooled managed Gigabit Ethernet switch with internal PSU, no console port and 24 ports PoE capable per IEEE 802.11at (max. 30W per port, 370W PoE budget). The datasheet says 20 dB(A) noise level at no load. I believe this is the least noisy 48 port PoE capable switch in existence.
The HPE Aruba InstantOn 1830 model with 48 ports and PoE support seemed very promising, given that the datasheet indicated a very low figure for the fan noise in idle scenarios. Also, the price of 480 € seemed reasonable and thus the switch was ordered.
The unboxing and first power on were very promising: The Aruba 1830 has a refreshingly stylish design featuring a white chassis and orange Aruba logo on the top side. First power on, the fans come up at 100% which is much deeper a sound compared to other 1U rack components. After startup, they slow down significantly to a level that is perfectly acceptable for my working environment, music listening (regular PC drowns the noise of the switch) and neighbors (not audible through the door to next room).
The chassis is rather deep almost reminding of a small 1U server form factor. The supplied rack ears are lighter material compared to the ones of the Juniper EX2200 (which is similarly heavy although a little shorter). Indeed, even after screwing the switch tightly into the rack, its rear end would point slightly downwards. I have never observed that with another rack component. To me it seems that given the size of the chassis, it would be best to mount it at four points (or with static rails or…) but nothing of that sorts was included and there are no obvious holes in the chassis hinting towards an alternative mounting option.
The airflow seems to be designed left-to-right which is an odd choice for a rack component but sensible given the fact that the front side of an 48 port chassis does not allow for much airflow in the front-to-back direction.
The assignment of status LEDs is also curious. I knew the following standard variants:
- Two LEDs per port directly at the respective ports. One typically to indicate port activity and the other often used for speed or POE or… with typical colors green or amber. The Cisco SG110-16HP does it this way. The Juniper EX2200 follows this convention too, with the additional twist that the meaning of the LED can be cycled with a button at the far right side of the switch.
- A separate panel of LEDs with typically one or two LEDs per port but in a separate array and no LEDs at the ports. This seems to be common with < 48 ports switches e.g. the TP Link TL-SG3216 does it this way.
The Aruba 1830 follows a third convention: It has two LEDs at each of the upper ports with the left one signalling for the upper port and the right one for the lower port. Its OK to do it this way, but why invent a third signalling variant?
The default login is admin and no password
(leave the form empty!). I had to search online for this info because
while there is a quick start card included, it focuses on the
cloud-based management offering whereas I wanted to it the old-fashioned
local way. The name InstantOn hints towards the cloud option.
Thankfully, local management is still perfectly supported and the web
interface looks a little more modern compared to other brands.
First step with a new networked component is always install the most recent firmware update. The go-to site for the Aruba 1830 seems to be this URL: https://community.instant-on.hpe.com/blogs/jamie-easly1/2022/02/07/1830?.
Like other users, I found it a little strange that the distribution point for the firmware updates would be a “community” page with the update file links themselves looking like some attachments of the community forum that anybody could have uploaded/created. I found no way to authenticate the origin of these files, but since I also didn’t find any alternatives went ahead and installed the most recent one.
After completion of the firmware update, I went ahead to configure my settings. To begin with, I created two VLANs, a VLAN 2 for audio and a VLAN 1 for the remainder of traffic (default). Then, I assigned these VLANs to dedicated ports (1-6: Audio, remainder of ports: default). PoE worked fine right away so I went ahead and inserted all the network cables.
The default network was working all-OK, but I got into trouble with the audio network: The audio would frequently drop out or lose connection entirely. Upon checking, this was (typically always is) related to an issue with the clock synchronization. Turning off all “green Ethernet” features (for testing), didn’t improve the situation.
Hence it seemed that some adjustments in the QoS settings might be needed. A basic approach of just assigning all the audio ports higher priority than all the other ports didn’t cut it hence I tried to configure the QoS settings properly and was surprised to find that no DSCP settings were offered at all. After an unsuccessful attempt to guess the assignment between CoS and DSCP I also searched online and only found the following link to the community with no answers since months (as of 2025-02-09, question was from 2024-12-18): https://community.instant-on.hpe.com/discussion/1830-dscp-mapping.
Now I could have added a “me too” to this question but there was an additional point to consider: I remembered that at the beginning of my audio tests, I had used multiple switches (Dell PowerConnect 2848 and TP Link TL-SG3216) successfully for AES67 even without bothering with the QoS/CoS/DSCP settings only configuring them later on the TP Link due to some very rare issues and in order to rule out any QoS related issues for the future.
- Dell PowerConnect 2848
- 48-port 19” rack-mountable actively cooled managed Gigabit Ethernet switch with internal PSU, console port and no PoE support. It is too loud for my usage but smaller models (8 and 16 ports) are known to work well for AES67 and the larger one seems to do fine for audio usage, too. I tested with only three audio devices, though :)
I concluded that in this case, it could be likely that even if the info about the DSCP assignment from the community question were available, it might not be sufficient to get AES67 audio networking running reliably on the Aruba 1830.
I opted to make use of the option to send it back within 14 days of receipt as granted by the law for online shopping in Germany.
Back To Square One
After all of these adventures with switches, I now had an additional old switch (Juniper EX2200) for backup, but no solution for the primary network. No real nice option (48 port PoE switch silent and with AES67 support) seemed to be available at all.
The second best option would still involve multiple switches e. g. a 24 port primary one and some (possibly smaller/older) satellite one. I. e. the best way forward if money would not be a concern at all would probably be the Cisco CBS350-24P-4X.
I wasn’t ready to spend the >600€ for a second-best solution, though. Hence back to checking the options of the existent hardware - a third-best solution…
I could (and unsuccessfully did, see above) play more with the EX2200 or I could check if it would be possible to do another, smaller improvement to the network using existent hardware.
It turned out that indeed, there was something that could be done: By connecting the TP Link to be “always online” I could achieve 30 ports (two 16 ports switches) with limited PoE support. The Cisco SG110-16HP is unmanaged and thus doesn’t support AES67 audio needs. Also, it supplies at most 15W per port which is too little for the audio interface, but of course I could keep supplying the interface with a dedicated PSU like before the switch experiments.
I.e. the new target topology was something like this:
    ┌────────┐
    │ ISP    │     ┌───────────────────────────────┐
    │ Router ├─────┤ Cisco SG110-16HP              │
    └───┬────┘     └┬─────┬─────────┬────────────┬─┘
        │           │     │         │            │
    ┌───┴─────┐     │ ┌───┴┐ ┌──────┴───────┐  ┌─┴───────┐
    │ Some    │     │ │ PC ├─┤ PC with      │  │ More    │
    │ devices │     │ └───┬┘ │ direct 10G   │  │ devices │
    └─────────┘     │     │  │ connectivity │  └─────────┘
                    │     │  └──────────────┘
                    │     │                    ┌────────────┐
                  ┌─┴─────┴───────────┐        │ Even more  │
                  │ TP Link TL-SG3216 ├────────┤ devices    │
                  └──────┬────────────┘        └────────────┘
                         │
                    ┌────┴──────────┐
                    │ Speakers      │
                    │ and Interface │
                    └───────────────┘
There was only one obstacle to this path: The TP Link switch is rack-mountable, but I didn’t have the necessary rack ears and they seemed to be hard to buy online. Hence before I had always thought of that switch as some sort of temporary option only.
In order to rack it up properly, I would have to get my hands on some rack ears. Since I couldn’t find the official ones anywhere, I hacked together my own replacement based on generic metal parts and a lot of cursing while trying to drill the proper holes. If you want to do the same: Get parts which do not have existing holes as chances are you would like to drill your holes overlapping with the existent ones and I found that to be much harder than drilling a proper hole where none was in place yet.
Only downside of this approach is that of course, the dimensions don’t really fit the rack and now my DIY rack ears are slightly higher than 1U. I can live with that and if it were to become necessary, using proper tools (which I don’t have) it might even be possible to cut them down to 1U proper.
In any case, after solving the rack-mounting issue, the configuration to split the switch into two VLANs (just like attempted with the Aruba 1830 before) could be successfully performed on the TP Link and for now the network is running fine this way.
Future Directions
If any of the two used switches fail, check the market again for a 48 port PoE fanless or silent audio-capable “endgame” switch, otherwise get a Cisco CBS350-24P-4X (or C1300-24P-4X?).
If Firmware 12.3R5.7 for the Juniper EX2200 could be obtained, it is supposed to contain a less annoying fan control in the firmware. It might be interesting to deploy this together with a variant of my attempted Sunon fan mod. I. e. connecting the extra rear PSU exhaust fan to +12V via a resistor rather than in parallel to the original fan. This might yet be the least noisy way to operate it.
Key Findings
- In general, datasheet values of fan loudness are not related to real-world noise emission as the fan control plays a key role in determining the noise level.
- Juniper makes very nice high-quality hardware.
- Juniper EX2200 fan mod is difficult to get right and I have not arrived at a satisfactory outcome in attempting this.
- HPE Aruba InstantOn 1830 JL815A is probably the least noisy 48 port PoE switch.
- HPE Aruba InstantOn 1830 JL815A is not compatible with AES67 audio networks.
- TP Link TL-SG3216 is compatible with AES67 audio networks.